Tag Extents and Lazy Detail Components
Originally Published inToday, let’s highlight two really nice contributions from the Revit API discussion forum ↗:
First, though, a little aphorism to ponder:
Yesterday, I was clever and tried to change the world.
Today, I am wise and try to change myself.
– Rumi
Determining Tag Extents
We repeatedly discussed how to ensure that tags do not overlap, both here and in the Revit API discussion forum ↗, e.g., in the threads on tags without overlapping ↗ and auto tagging without overlap ↗.
A hard-coded algorithm to achieve partial success was presented in the latter and reproduced in Python and Dynamo autotag without overlap ↗. A more complete solution using a more advanced algorithm is now available commercially, called Smart Annotation ↗ by BIMLOGiQ ↗.
One prerequisite for achieving this task is determining the extents of a tag.
AmitMetz ↗ very kindly shares sample code for a method to achieve this in the thread on tag width/height or accurate BoundingBox of IndependentTag ↗. Says he:
Following the helpful comments above, here is a method that returns tag dimensions.
A few comments on the implementation:
- First, we need to make sure the LeaderEndCondition is free in order to find the LeaderEndPoint.
- Move the tag and it’s elbow to LeaderEndPoint.
- We get the correct BoundingBox only after moving the tag and it’s elbow, and committing the Transaction.
- I tried to use an unwrapped
transaction.rollbackwithoutTransactionGroup, but it didn’t work. So, if we want to keep the tag in its original location, we have to commit the transaction and then roll back the transaction group.
/// <summary>
/// Determine tag extents, width and height
/// </summary>
public static Tuple<double, double> GetTagExtents(
  IndependentTag tag)
{
  Document doc = tag.Document;

  //Dimension to return
  double tagWidth;
  double tagHeight;

  //Tag's View and Element
  View sec = doc.GetElement(tag.OwnerViewId) as View;
  XYZ rightDirection = sec.RightDirection;
  XYZ upDirection = sec.UpDirection;
  Reference pipeReference = tag.GetTaggedReferences().First();
  //Reference pipeReference = tag.GetTaggedReference(); //Older Revit Version

  using (TransactionGroup transG = new TransactionGroup(doc))
  {
    transG.Start("Determine Tag Dimension");

    using (Transaction trans = new Transaction(doc))
    {
      trans.Start("Determine Tag Dimension");

      tag.LeaderEndCondition = LeaderEndCondition.Free;
      XYZ leaderEndPoint = tag.GetLeaderEnd(pipeReference);
      tag.TagHeadPosition = leaderEndPoint;
      tag.SetLeaderElbow(pipeReference, leaderEndPoint);

      trans.Commit();
    }

    //Tag Dimension
    BoundingBoxXYZ tagBox = tag.get_BoundingBox(sec);
    tagWidth = (tagBox.Max - tagBox.Min).DotProduct(rightDirection);
    tagHeight = (tagBox.Max - tagBox.Min).DotProduct(upDirection);

    transG.RollBack();
  }
  return Tuple.Create(tagWidth, tagHeight);
}
Many thanks to Amit for this nice implementation!
One-Click Detail Family Generator
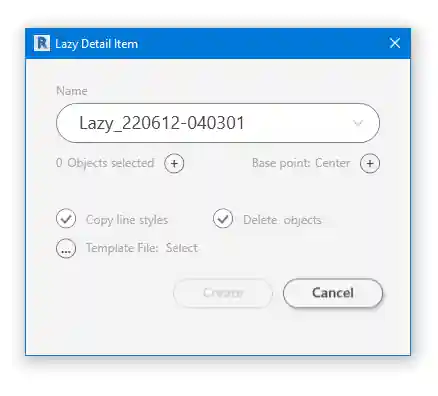
Another nice solution and entire open source sample add-in is shared by Peter PitPaf ↗ of Piotr Żuraw Architekt ↗ presenting one click convert detail elements to detail family ↗:
I’m working on a Revit add-in to automate and simplify creation of detail Components families.
This is helps create detail components on the fly just in model view.
It allows the user to draw parts of a detail with lines and fill regions in model view and change it to a component without opening the family editor.
Here I want to share with you the first version of this add-in, including source code and compiled install files:
github.com/PitPaf/LazyDetailComponent ↗
Feel free to use it if you find it interesting. I appreciate all your comments.

Many thanks to Peter for implementing, documenting and sharing this nice solution!